The beautifully spiced and fragrant layers of biryani rice centred with juicy, tender meat and spices is pure bliss! Let us see how to make this biryani at home.
To all the non – veg lovers out there, have you ever said NO for a biryani??? I at least do not think so. Thank God, no one from my family tends to fall in these categories. There may be a few, who specifically believe that making biryani is very technical and tough game. But if you mentally prepare yourself for achieving your goal you can do anything. Indeed, it is a game of cooking strong and getting the perfect taste out of each ingredient. But never lose hope or confidence. Failure comes with a message of giving another try to make it a success.
About the recipe
Today, I am sharing the most demanding authentic Bombay Mutton Biryani recipe with you all. Generally, the meat biryani is made by two methods. One is the Hyderabadi Kacche Gosht ki Biryani and the other method is pakki gosht ki biryani. And my this particular recipe falls under the pakki category. Here is the difference between the two methods: In Kacchi mutton biryani, the layer of marinated and uncooked meat pieces is placed as the bottom layer. Then the cooked rice is layered on the top of marinated meat layer followed by the process of slow cooking. Whereas in Pakki mutton biryani, we cook the marinated mutton first. And then we layer it between the rice. In this method, we do not use raw papaya paste at all. For the reason, we will be cooking the meat well before the layering part. Usually, any recipes of biryani do involve a series of steps to follow. It indeed includes marination, to cook mutton, to cook rice, layer the cooked mutton and rice and then dum it. Another important thing that makes the biryani royal and rich in taste is the making of birista. Birista, particularly, is the most effort indulging process of making as per many people. We were told as a kid that a person who can make a perfect birista is the one who can make anything. And I took that too seriously in my head. Right from chopping to frying, it is an eye keeping procedure. And, if you miss the point of turning off the flame at the right time, you may probably burn the onions. Note : You Can Check My Step By Step Process to make Birista For Biryani
Meat marination ingredients
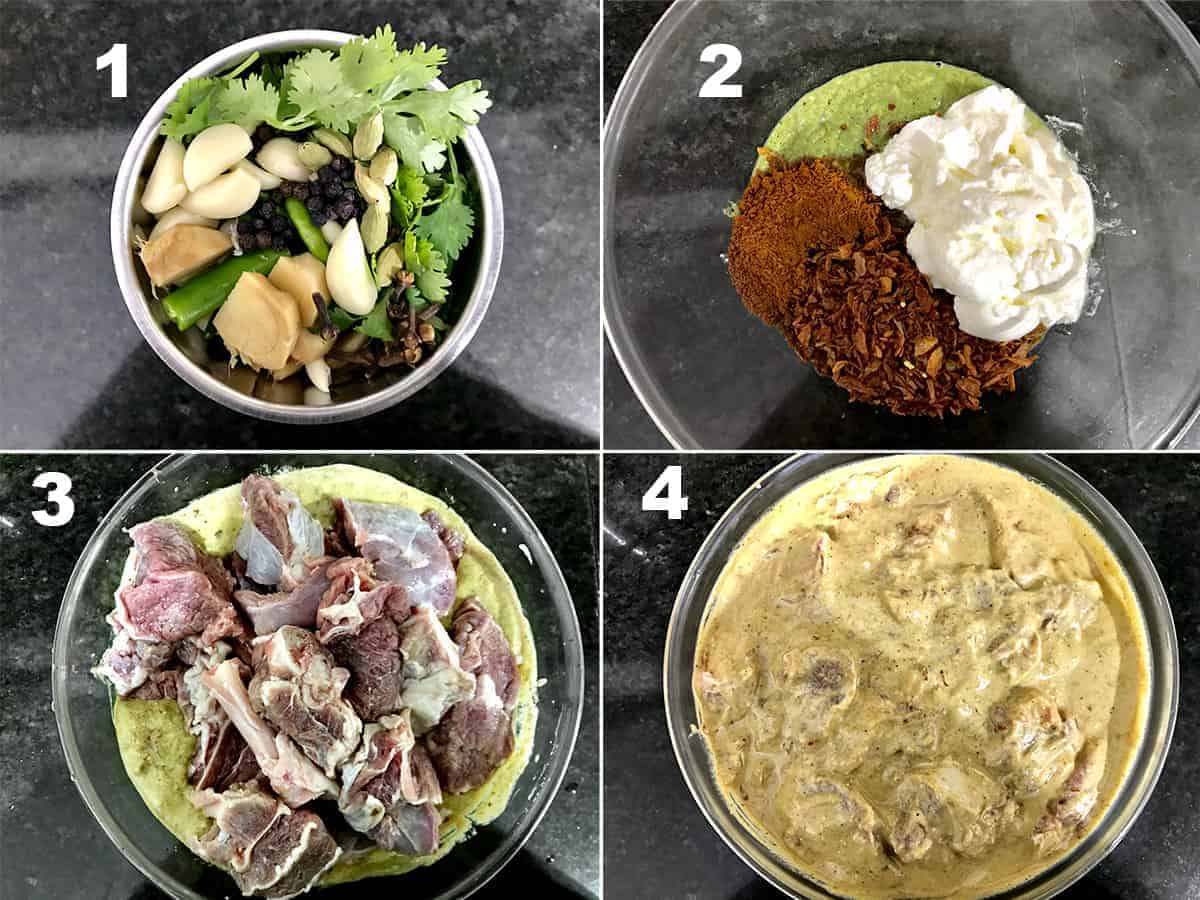
Let us get our hands over to the meat marination. The recipe of mutton biryani calls for goat meat (lamb) on bone. Clean and wash it well, then drain all the water, if any. Then, you need to make a paste of fresh ingredients to gives a nice spicy and tasty punch to the meat. So, assemble peppercorns, cardamoms, cloves, garlic cloves, ginger pieces, coriander leaves and green chilies. Now, grind these all in into a paste. After that, take thick yoghurt, birista, garam masala powder and ground paste into a bowl, and marinate the mutton pieces into it. Further, the other elements that we need to make mutton masala base are sliced onions, cumin seeds, cinnamon sticks, tomatoes, green chilies. The spice powders that goes in are red chili powder, turmeric powder and coriander powder.
To boil rice and layering the biryani
I have used long grain basmati rice, bay leaves, shah jeera, cinnamon sticks, cloves, star anise, water, ghee and green cardamom (choti elaichi). You will need some more ingredients here as well. So, gather a stack full of mint leaves, birista, saffron soaked in milk and ghee are perfect enough to go with the layering. The homemade mutton biryani may seem to be pretty lengthy in process with too many preparations. Trust me, it is very easy to make.
How to make Mutton Biryani
Let’s get started with step by step images for our lip smacking Bombay style mutton biryani recipe.
Step 1 - Preparation and Marination
- To begin with, first, add all the ingredients mentioned under “to grind to paste” into a blender and blend it to a fine paste.
- Then, in a large bowl, add ground paste, ¼ cup fried onions, whisked curd, and garam masala powder along with salt.
- Now, add clean and washed mutton and mix well.
- Allow the mutton to marinate for at least 2 hours (preferably over night) under refrigeration.
Step 2 - Frying the potatoes
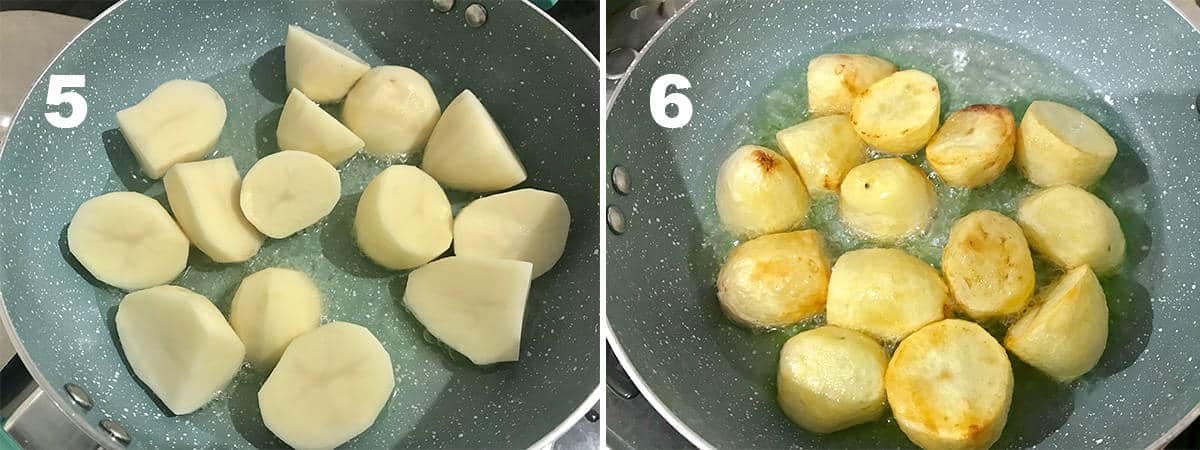
- Once the mutton is ready to cook, then heat oil in a pan, add potato cubes.
- Fry the potatoes until golden. Then take them out and set it aside for later use.
Step 3 - Cooking the mutton biryani gravy
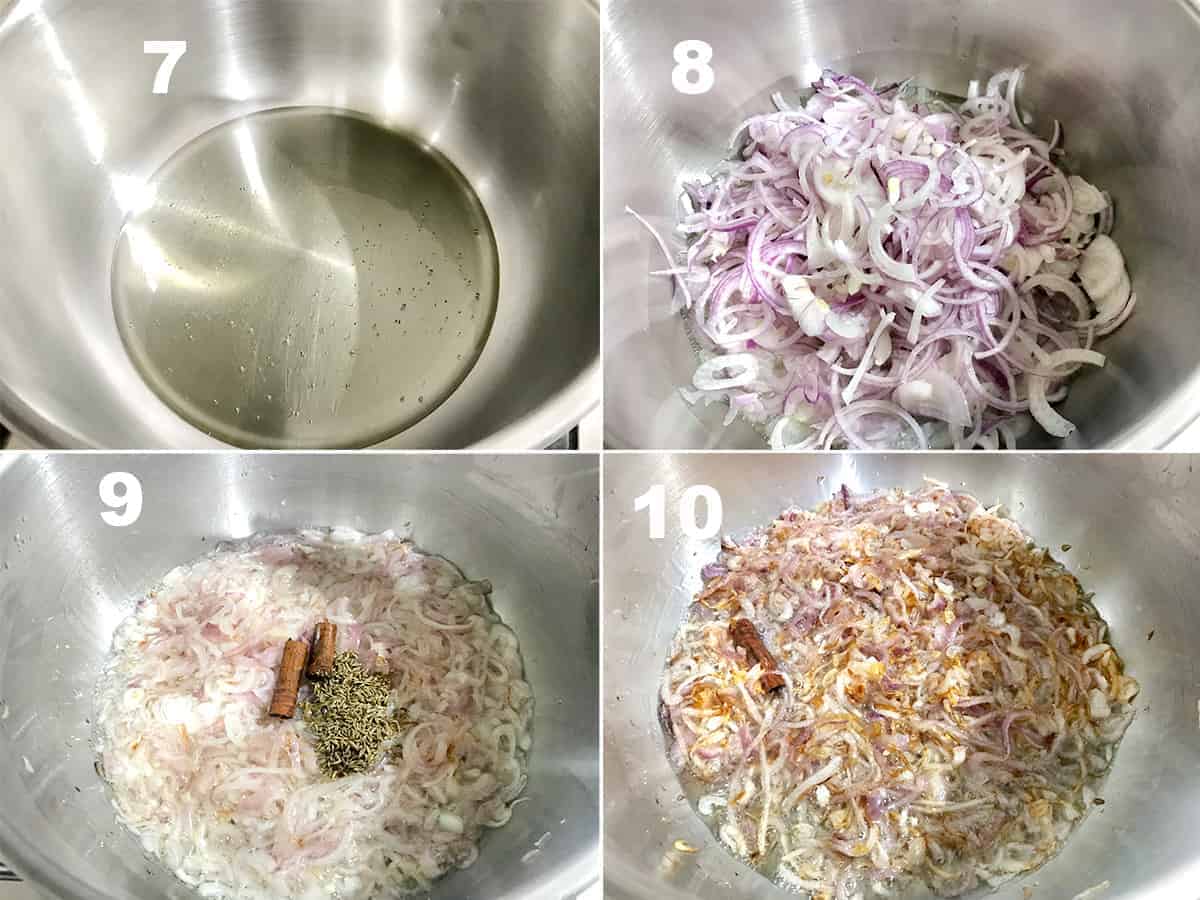
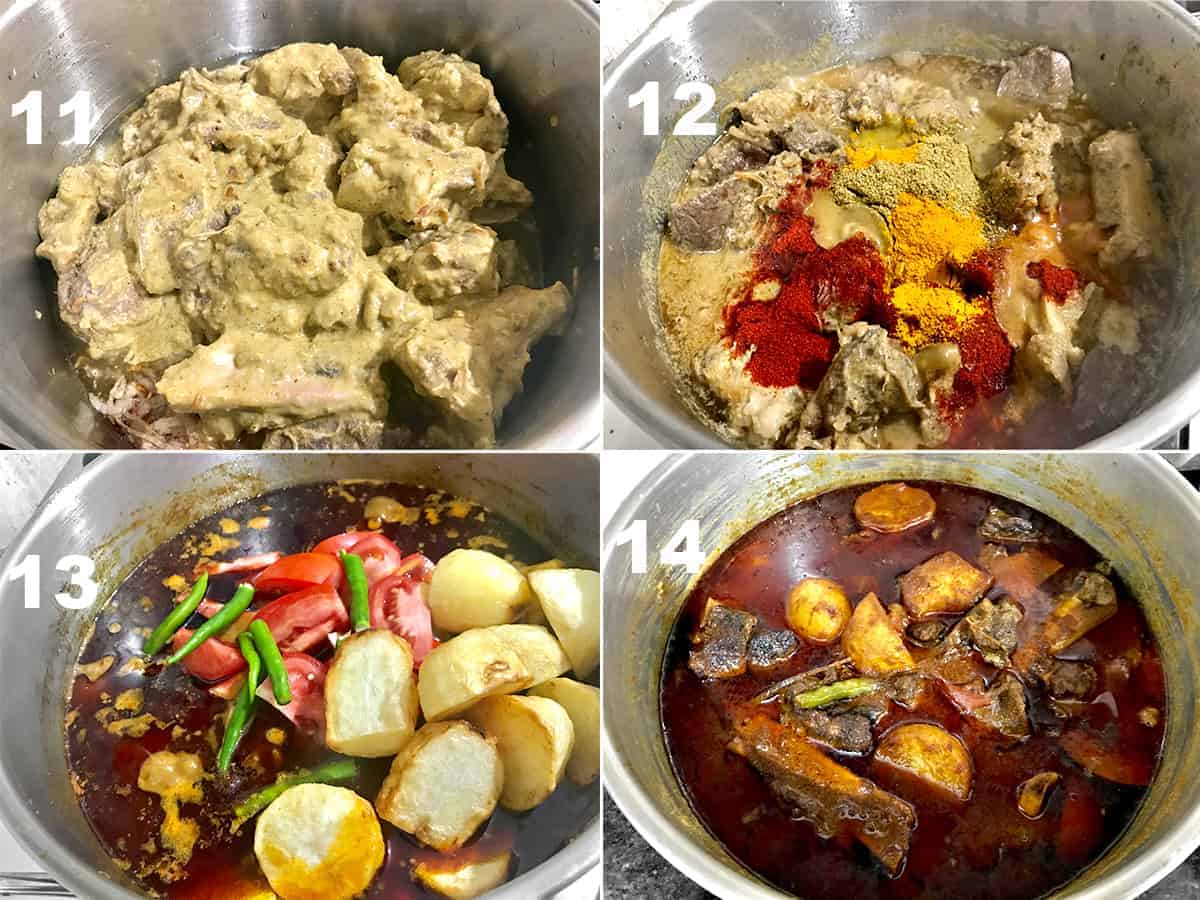
7 & 8. First, heat oil in a heavy bottom pan or handi. Then, add sliced onions, salt and fry until pink. 9. Once the onions softens, add cinnamon sticks and cumin seeds and cook. 10. Fry everything until onions starts picking up golden colour, do not over brown or burn it. 11. Now, add marinated mutton and sauté on high 5-6 minutes until raw small goes off. 12. Then, add red chilli powder, turmeric and coriander powder and mix. Now, add 2 cups of water, cover and cook the mutton until tender. This will take approx 50 minutes as I have made it in handi. Do not over cook the mutton at this stage. Keep stirring in between to avoid burning. If water dries up, you may add more. Note : You can make it pressure cooker as well to save time. Also, make sure, if you are cooking it in pressure cooker, do not add to much water at a time. We need to cook it such that not much water is left in cooked mutton. 13. Now, add tomato slices, fried potatoes and chilies and cook for another 5 minutes. 14. You will see oil layer on the top, and mutton masala has not much water into it. This is the perfect mutton masala for biryani recipe. Now, carefully scoop out the layer of oil in a bowl and set it aside for later use.
Step 4 - Cooking the rice
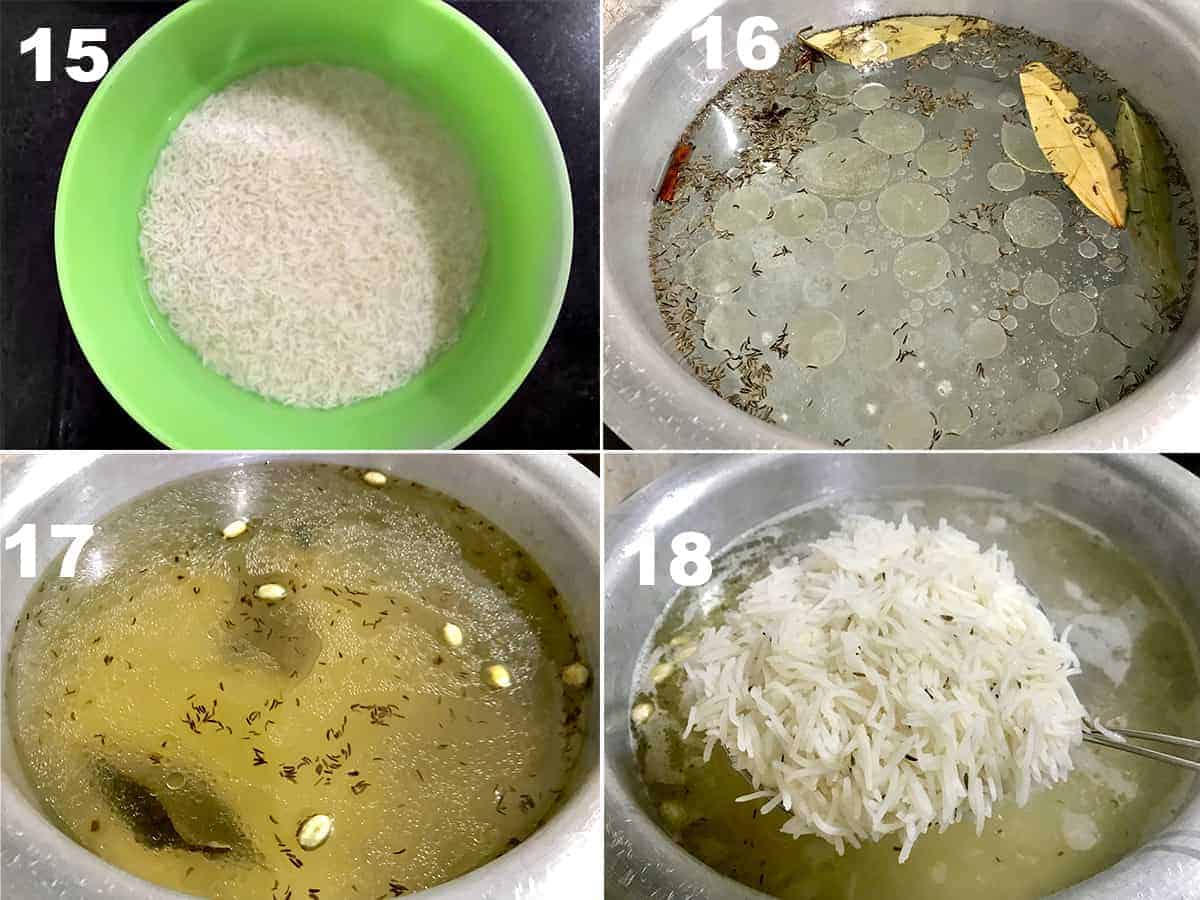
- While the mutton cooks, clean and wash the rice and soak it for 45 minutes.
- Then, in a large pot, add enough water, bay leaves, cinnamon sticks, shajeera (or cumin seeds), cloves, cardamom, star anise, ghee and salt. Bring it to a boil.
- Once the water starts boling, starin the soaked rice and add into boiling water.
- Cook the rice until 90 percent done. Note : Do not over cook or rice will get sticky and will break in biryani. Immediately strain the water and set the rice aside.
Step 5 - To layer the biryani
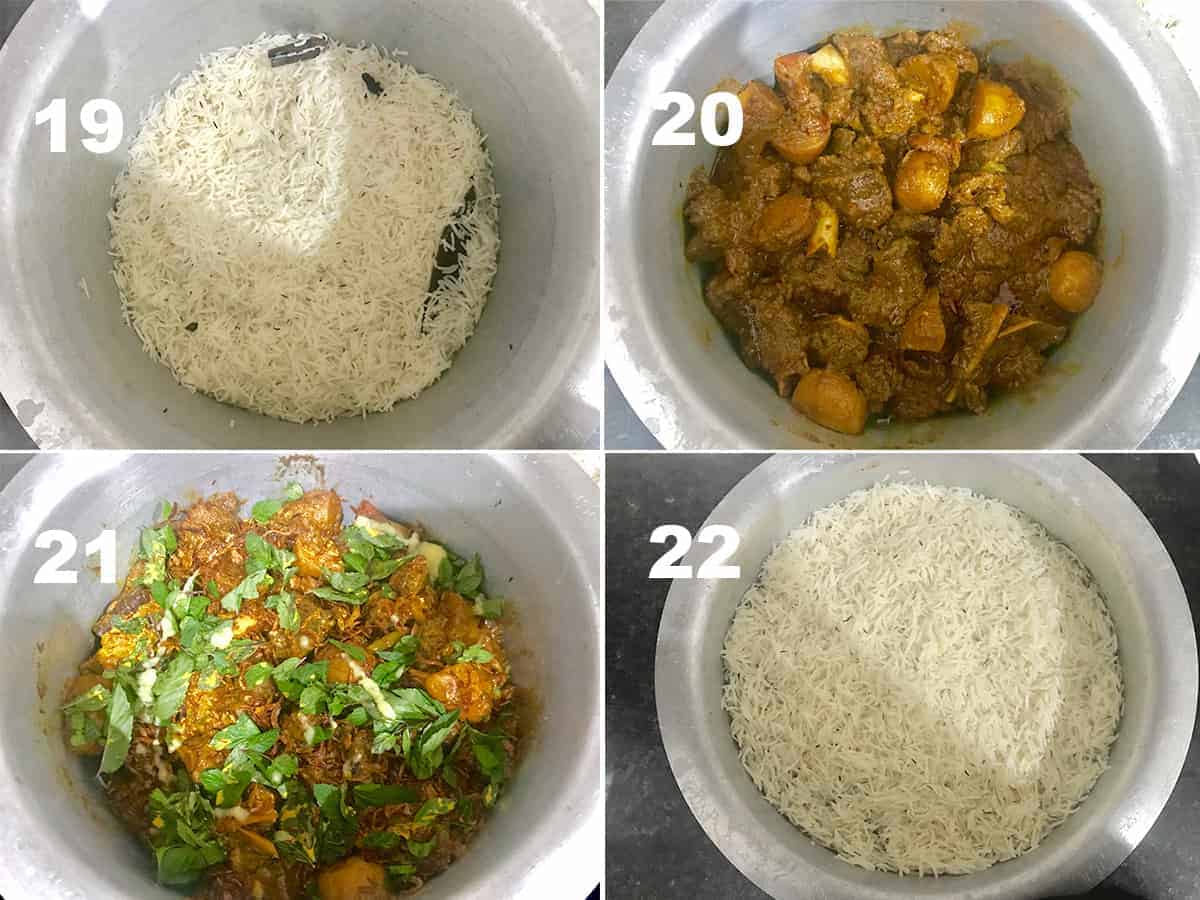
- Now, in a large pot in which you want to slow cook or dum the rice and meat, add half the cooked rice as a bottom layer.
- Then, add the cooked mutton and spread evenly.
- Sprinkle mint leaves, 1 tablespoon ghee, ½ of the soaked saffron and birista.
- Then, add the remaining rice over the meat layer evenly.
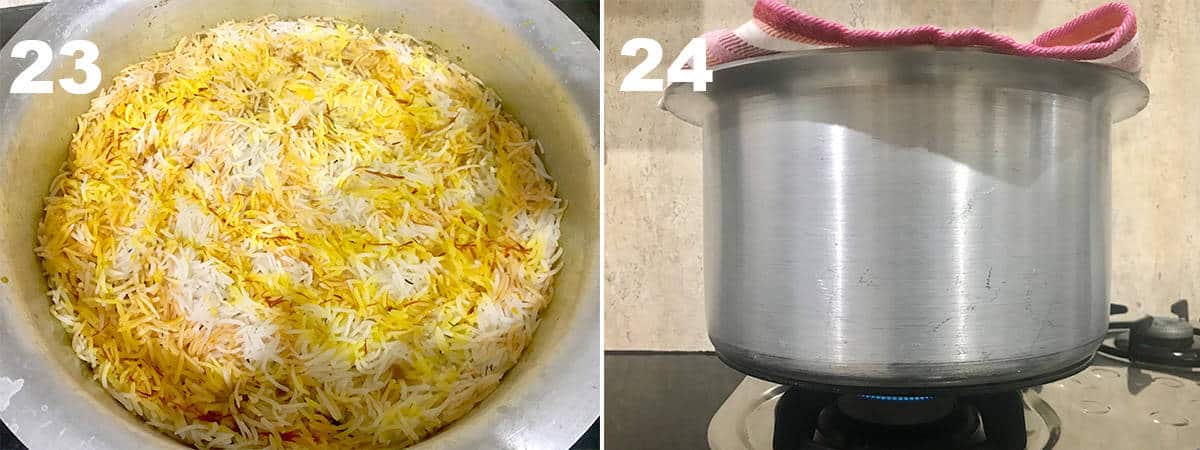
- Now, pour remaining ghee, saffron milk and reserved oil that we scooped out from the masala gravy.
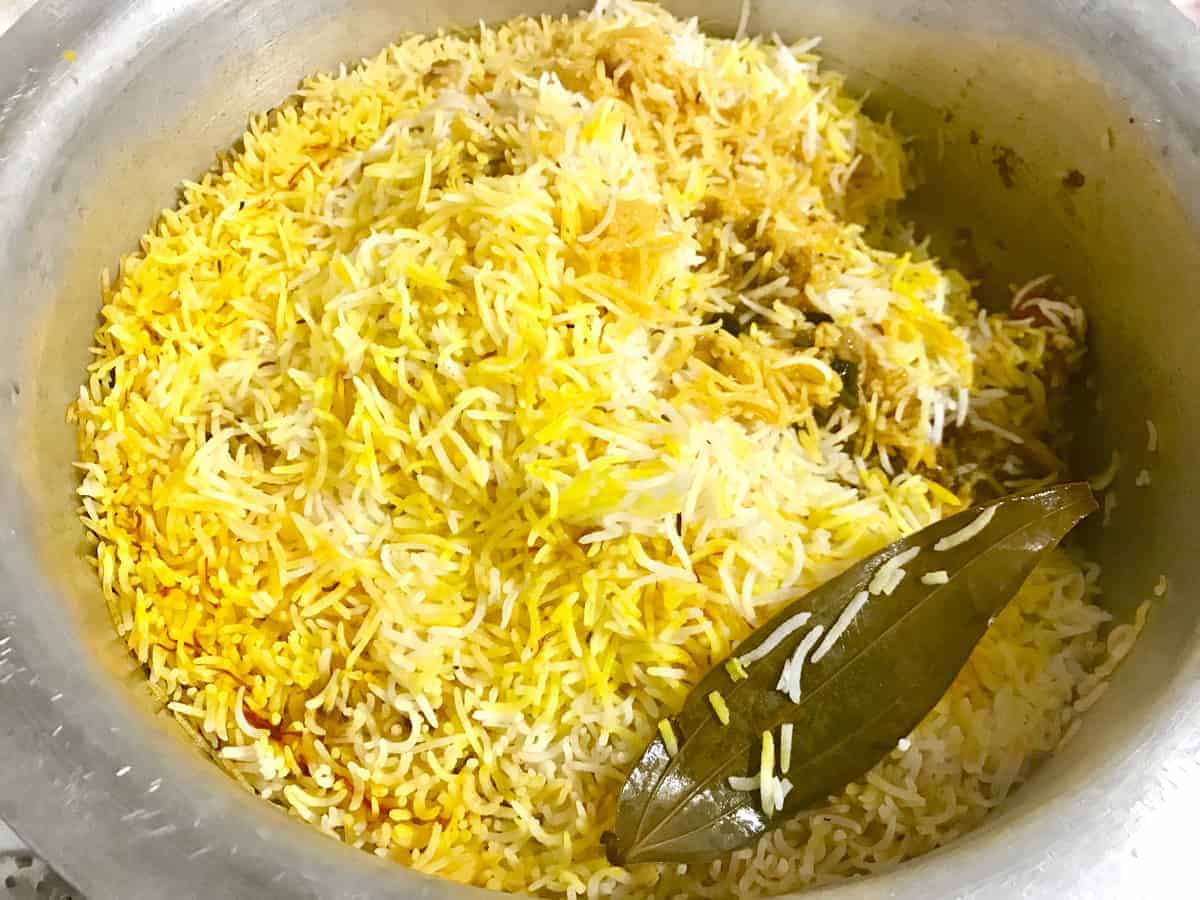
- Finally, put a clean cotton cloth over the top and cover it with the lid putting heavy weight on the top of the lid. Slow cook (dum) the biryani for 20 minutes, first on high flames for 5 minutes and then simmer for 15 minutes. Once the biryani is done, allow it to rest for 15 minutes. Then carefully dish out the mutton biryani. Serve with raita of your choice.
Expert Tips
Rice : Most noteworthy here is, always use aged best quality long grain basmati rice. Never ever compromise on this point. Longer the grains of rice better will be the mutton biryani, both visually as well as in taste. I prefer to use at least 1 year aged Basmati rice for making biryani. Some people also like to use sella rice as well. Hence you may choose it if you want to. But, the basmati rice is always the winner. Meat Cut : Personally, I love to use a little large than medium sized pieces of a lamb or goat shoulder meat cut. It gives a nice and tender chunks when cooked perfectly. However, you can use raan (hind leg meat cut) to make mutton biryani. Marination : Always marinate the meat in masala for at least 2 hours, I prefer the marination overnight. Yes, marination is the soul to any of the biryani recipes except the egg biryani. Cooking Rice and Biryani : Be sure to cook the rice as mentioned, i.e 90 percent which is exact 9 minutes from the point when rice starts boiling on high heat. Also, do not stir the rice too much while boil as it may break the rice grains, hence, the result will not be as we want it to be. Lastly, do not use thin bottom pan, always use heavy bottom pan or handi or dutch oven to make the dish. For the final dum, always, cook the biryani on high for 5 minutes and them simmer to dum for 15 minutes. This helps in generating steam well cooking the rice perfectly each time.
How to make pakki biryani in the Instant Pot?
Making mutton biryani is Instant pot not at all difficult. But, to make this layered one you need to cook rice on stove top and the, you can simmer it in IP. As I own 6 quart IP DUO60, when making mutton biryani, I either reduce the recipe to half or ¾ of the below measure. It is either 500 grams mutton and 2 cups (400 gms) of rice or 750 gms mutton and 3 cups (600 grams) of rice. 1 kg of mutton with 900 grams of rice can be cooked easily in 8 quarts IP. Follow the exact method of marinating the meat with masalas as mentioned. You can fry the potatoes either in pan on stove top or sauté it in IP before cooking the mutton. Set it aside. Then, cook the mutton masala in Instant Pot for 15 minutes on “High Pressure”. Do not add too much water as we will have lot of gravy otherwise to reduce until it reaches required consistency. ½ cup - ¾ cup is good enough to proceed with the pressure cooking. I usually cook it between 15-17 minutes depending upon the meat cut I use. Shoulder cut meat chunks cooks well in 15 minutes. Let the pressure release naturally. Add fried potatoes and tomatoes, and sauté it for 3-4 minutes. If you have lot of water left behind, sautéeing will help in reducing. Scoop out some oil from the meat and reserve. Boil the rice up to 90% in large pot on stove top or Induction as mentioned below. Then strain the rice and keep it aside. In the IP, Cooked mutton masala will be at the base. Sprinkle mint leaves, ½ of the saffron soaked milk and ghee. Layer the rice evenly on top of the mutton masala. Top the rice with the remaining saffron milk, ghee and also, pour the reserved oil form the mutton masala. Close the lid to sealing position, press ‘Keep Warm’ mode on and slow cook it for 30-40 minutes. For me, the ideal time that works here is 35-40 minutes. Once cooked, switch off the IP and let the biryani rest for 10 minutes. Pakki Mutton Biryani in Instant Pot is ready, dish out and serve with raita along the side.
More delicious Biryanis for you
If you made my Mutton Biryani recipe, please let me know how it turned out for you! I’d love to hear through your comments and ratings below. If you are looking for more delicious and easy recipes delivered straight to your inbox, you can sign up for my email newsletter. You can also follow me on Pinterest, Instagram or Facebook to see more of my kitchen creations.
📖 Recipe
